 |
      |
|
|
|
|
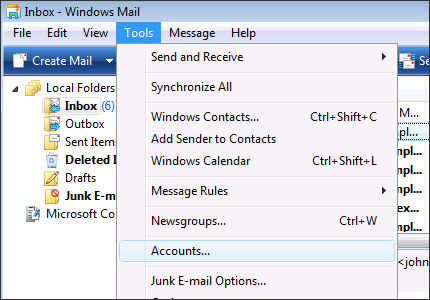
You can set up Windows (Vista) Mail to work with your email account.


Click on the Servers TAB to continue - Click on the actual word Servers, as shown below.

Fig 3.4 Click on the Servers TAB to continue

Fig 3.5 The Servers TAB (window)
The only setting you need to change on the Servers TAB is the MY SERVER REQUIRES AUTHENTICATION setting, which you should put a tick next to only if your SMTP (Outgoing) Server requires authentication. If it does not require authentication, leave the MY SERVER REQUIRES AUTHENTICATION setting un-ticked.

Fig 3.6 Put a tick next to the MY SERVER REQUIRES
AUTHENTICATION setting, if your Server requires you to.
When you put a tick next to the MY SERVER REQUIRES AUTHENTICATION setting the SETTINGS button becomes available (above). If you want your outgoing e-mail to be authenticated (authorized) using the same settings (UserName & Password) as your POP3 (Incoming) Server there is no need to click on the SETTINGS button. Otherwise, if you want to use different settings (UserName & Password) to authenticate (authorize) your outgoing e-mail, click on the SETTINGS button to bring up the Outgoing Mail Server window.
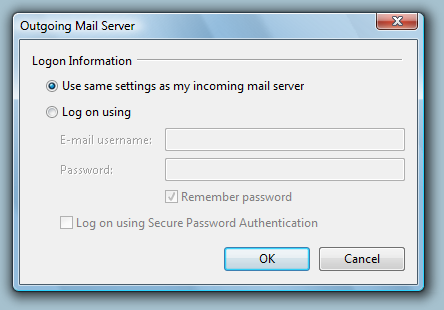
Fig 3.7 The Outgoing Mail Server window
When the Outgoing Mail Server window appears for the very first time the USE SAME SETTINGS AS MY INCOMING MAIL SERVER setting is the default setting. To authenticate (authorize) your outgoing e-mail using a different UserName & Password you need to change the default setting to LOG ON USING, by clicking on its radio (circle) button. Once this is done, you then have to enter the username & password you would like to use as the authenticating username & password into their appropriate edit boxes.
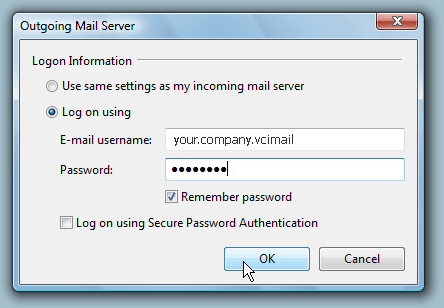
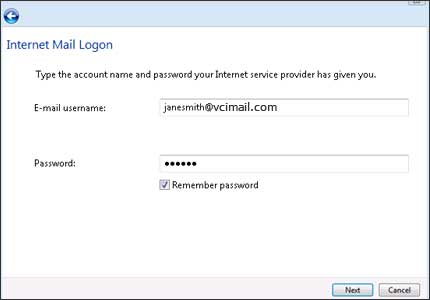
Fig 3.8 Enter your authorization UserName & Password into
their appropriate edit boxes
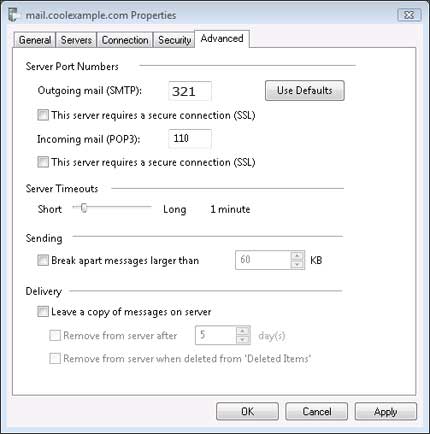
If you have trouble sending mail, try setting your Outgoing mail (SMTP) server port to 25.